


⚡ TL;DR: This guide helps Nassau County homeowners address ceiling water damage repair by explaining how to identify leaks, navigate insurance claims, and select professional services to prevent structural issues.
📋 What You’ll Learn
Handling ceiling water damage effectively requires quick action and expert knowledge to protect your Nassau County home. This guide provides actionable steps for identifying leaks, managing repairs, and securing your property.
- Identify the source of hidden leaks by learning how to trace moisture patterns across your ceilings back to the original point of failure before major structural damage occurs.
- Implement critical containment strategies to stabilize your ceiling quickly after a leak is discovered, helping you prevent immediate interior collapses while waiting for professional help to arrive.
- Navigate complex insurance claim processes by gathering the precise documentation required by New York providers to ensure you receive the proper coverage for your residential restoration project.
- Select qualified local restoration experts who specialize in moisture mitigation to ensure that your home is dried properly, preventing long term mold growth and persistent structural issues.
📖 Reading time: 7 min
✍️ Author expertise: Nassau County restoration contractor with twenty years of hands on water damage repair experience.
You wake up to the soft pitter-patter of rain, only to realize the sound is coming from your living room ceiling. That slow, rhythmic drip isn't just a nuisance; it is a ticking time bomb for your home's structure and your bank account.
Most homeowners in Nassau County ignore the first sign of a water stain until the plaster starts to sag or mold begins its ugly takeover. By the time you notice the peeling paint, the damage hidden behind your walls has likely already spread.
Fixing water damage is not about slapping on a fresh coat of primer and hoping for the best. To save your investment and keep your family safe, you need to know exactly how to stop the rot before it turns into a total collapse.
Let's look at the specific steps you must take right now to stop the leak and start the professional restoration process before the damage gets any worse.
Identifying the Root Cause of Nassau County Ceiling Leaks
In Nassau County, our homes face a unique set of challenges. From freezing winter cycles that crack pipes to coastal storms that stress our rooflines, water finds a way into your home through the path of least resistance.
You cannot stop a leak if you are only looking at the wet spot on your drywall. Often, the point of entry is feet away from where the water actually drips onto your carpet.
To find the culprit, you need to play detective. Here are the most common trouble spots we see across Long Island homes:
- Plumbing Supply Lines: Check the bathroom or kitchen directly above the leak for loose connections or pinhole leaks in copper pipes.
- Roof Flashing Failures: Look for cracked seals around your chimney, skylights, or plumbing vents that penetrate the roof deck.
- HVAC Condensate Lines: An clogged drain pan in your attic air handler can overflow, causing rapid ceiling saturation during the summer months.
- Attic Condensation: Poor ventilation in your attic space can lead to frost buildup in winter, which melts and drips down once the temperature shifts.
Do not wait for the ceiling to bulge before you act. Use a moisture meter if you have one, or simply press gently on the area to feel for soft, spongy drywall.
Once you locate the source, you have the upper hand. Identifying the root cause is the only way to ensure the repair stays fixed, rather than just masking the symptoms of a larger disaster.
Immediate Containment Strategies to Prevent Structural Failure
When water begins pooling on your ceiling, every second counts. If you ignore the drip, you are practically handing a sledgehammer to gravity. Your priority is to stop the water from compromising the drywall or plaster before the ceiling joists soak up too much moisture and lose their integrity.
Start by clearing the area beneath the leak. Move your furniture, electronics, and rugs to a dry room immediately. Once the floor is clear, grab a bucket and a sturdy screwdriver to perform a quick, controlled release of the trapped water.
Steps for Safe Water Release
- Place a bucket directly under the lowest point of the bulge.
- Use your screwdriver to poke a small hole in the center of the wettest area.
- This allows the water to drain into the bucket instead of saturating a larger section of the ceiling.
- Do not try to catch the water with towels, as they will quickly become heavy and might pull more debris down with them.
If you see the ceiling bubbling or drooping, stay clear. A saturated ceiling acts like a trapdoor. You should never stand directly under a bulge while trying to drain it. If the drywall feels soft to the touch or looks like it is bowing under significant weight, get out of the room and shut the door to prevent further damage until a professional restoration crew arrives to secure the structure.
Critical Warning Signs: A Comparison Table of Surface Stains vs. Deep Structural Damage
Most Nassau County homeowners make the mistake of assuming a small yellow spot is just a minor cosmetic issue. While some stains are indeed superficial, many others indicate rot lurking in the ceiling joists or attic insulation.
| Feature | Surface Stain | Structural Damage |
|---|---|---|
| Texture | Dry or slightly damp | Soft, spongy, or sagging |
| Odor | None or faint | Musty, pungent, or swampy |
| Growth | Does not spread | Rapid expansion in size |
| Material | Discolored paint only | Cracked drywall or warped wood |
If your ceiling feels soft to the touch, you are likely looking at a major structural failure in progress. When drywall absorbs water, it loses its rigidity and eventually becomes heavy enough to pull away from the fasteners entirely.
Watch for these red flags that demand immediate professional attention:
- The paint is bubbling or peeling in long, thick strips.
- You spot visible dark or black fuzzy growth around the edges of the leak.
- The ceiling surface has bowed downward like a sagging hammock.
- Cracks are radiating outward from the center of the wet patch.
Never poke at a sagging ceiling with a broom handle to see if it holds. This can cause a sudden collapse that puts you directly in the path of heavy, wet debris and potentially toxic mold spores.
Navigating Insurance Claims and Documentation for NY Property Owners
Dealing with a water-damaged ceiling in New York often feels like a battle against red tape. Before you start ripping down drywall, you must document every single detail to ensure your insurance company actually pays for the repairs.
Most policies require proof of the incident, so grab your phone and start recording. If you fail to create a clear paper trail, you might find yourself footing the entire bill for repairs that should have been covered.
Follow these essential steps to protect your claim:
- Take high-quality photos and videos of the ceiling damage before cleaning anything.
- Capture images of the source of the leak, such as a burst pipe or a damaged shingle.
- Keep a detailed log of every conversation you have with your insurance adjuster, including names and times.
- Save all receipts for emergency repairs, like tarping a roof or turning off the main water valve.
Remember that insurance adjusters are looking for reasons to minimize your payout. They often label water damage as long-term neglect, like a slow leak that went ignored for months, rather than a sudden disaster.
Counter this argument by providing professional inspection reports from a Nassau County restoration expert. Having a third-party assessment verifies that your damage was sudden and accidental, which is usually the golden ticket for getting your claim approved.
From Ceiling Collapse to Restoration: A Nassau County Residential Case Study
Last winter, a homeowner in Massapequa Park faced a crisis when a frozen pipe burst in the attic, resulting in a sudden ceiling collapse in their master bedroom. The weight of the saturated insulation and drywall tore through the joists, exposing the entire upper level to freezing temperatures and rampant moisture.
When our team arrived on the scene, the situation was dire. We had to act fast to protect the remaining structure from secondary damage.
The Restoration Process in Action
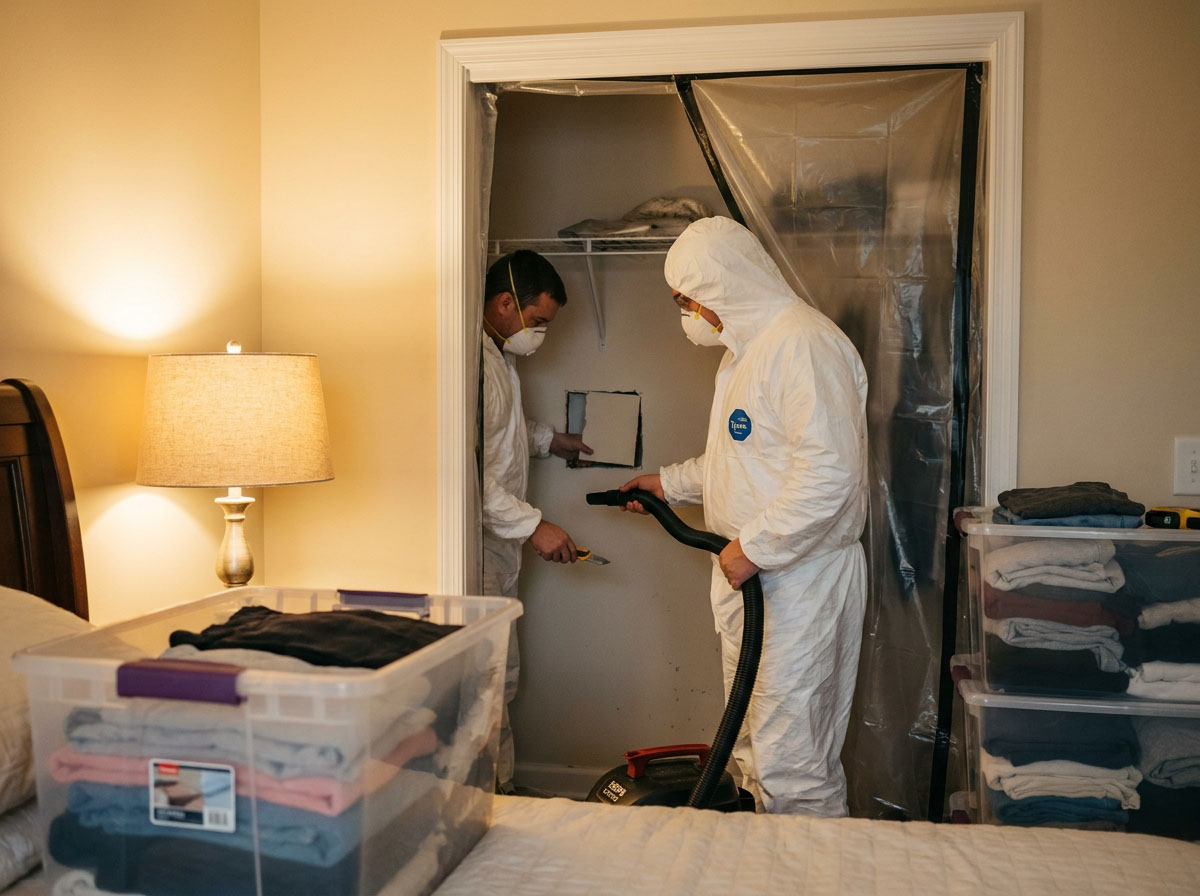
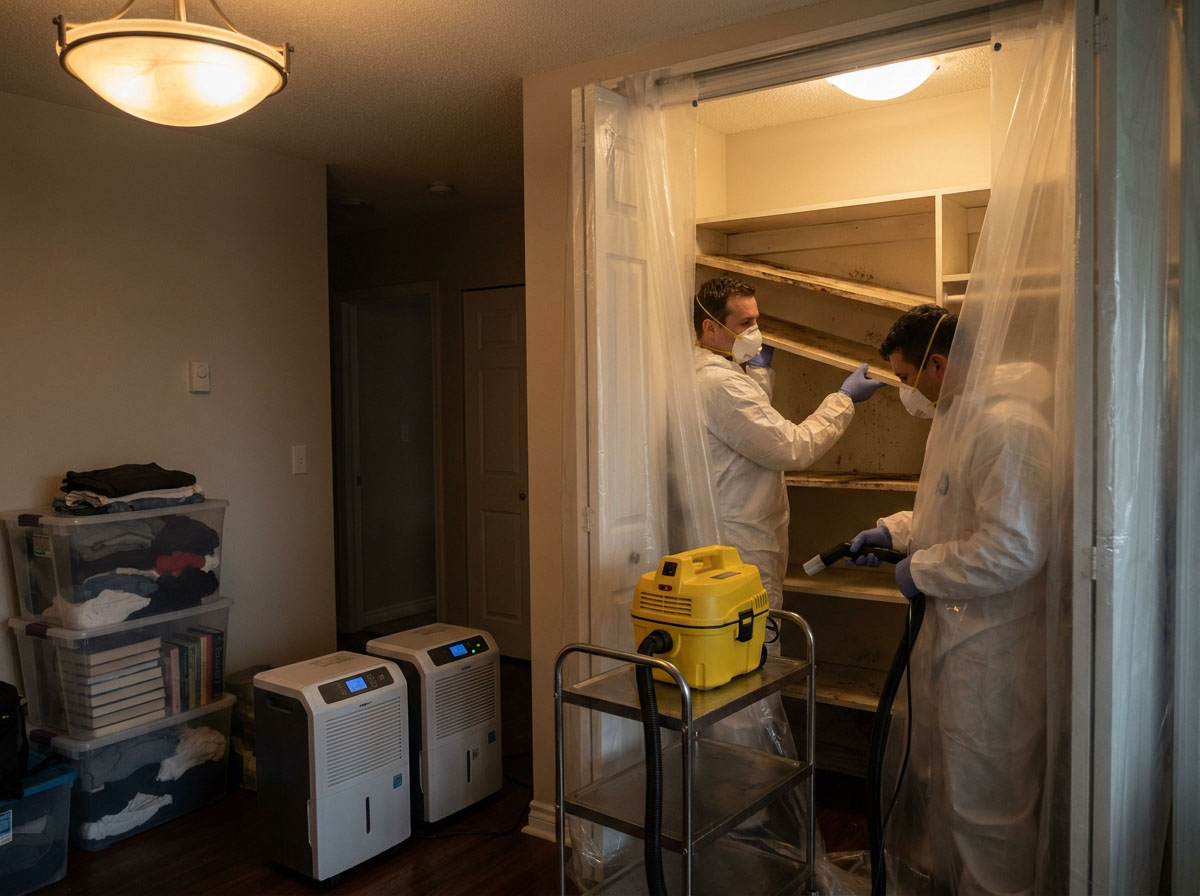
We kicked off the recovery with a systematic approach to save what could be salvaged. Our priority was preventing the spread of mold, which thrives in the damp, dark environments typical of Nassau County coastal homes.
- Immediate extraction of standing water using industrial-grade pumps.
- Removal of contaminated drywall and soaked fiberglass insulation.
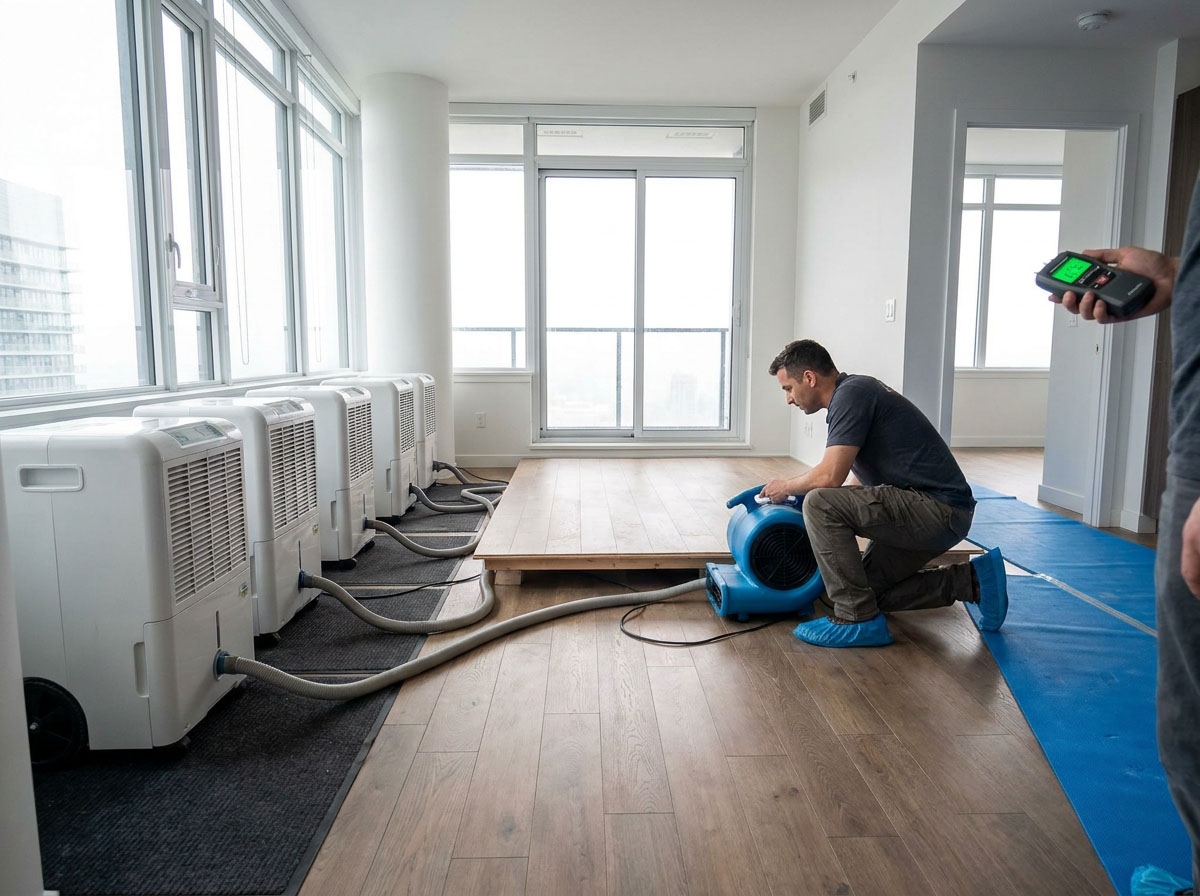
- Installation of high-velocity air movers to dry out the structural wooden beams.
- Application of antimicrobial treatments to neutralize bacteria growth.
By treating the home as a sealed environment, we successfully restored the space to its pre-loss condition in under two weeks. The homeowners avoided a complete teardown because they contacted professionals the moment the ceiling gave way.
Selecting Professional Remediation Services for Long-Term Mold Prevention
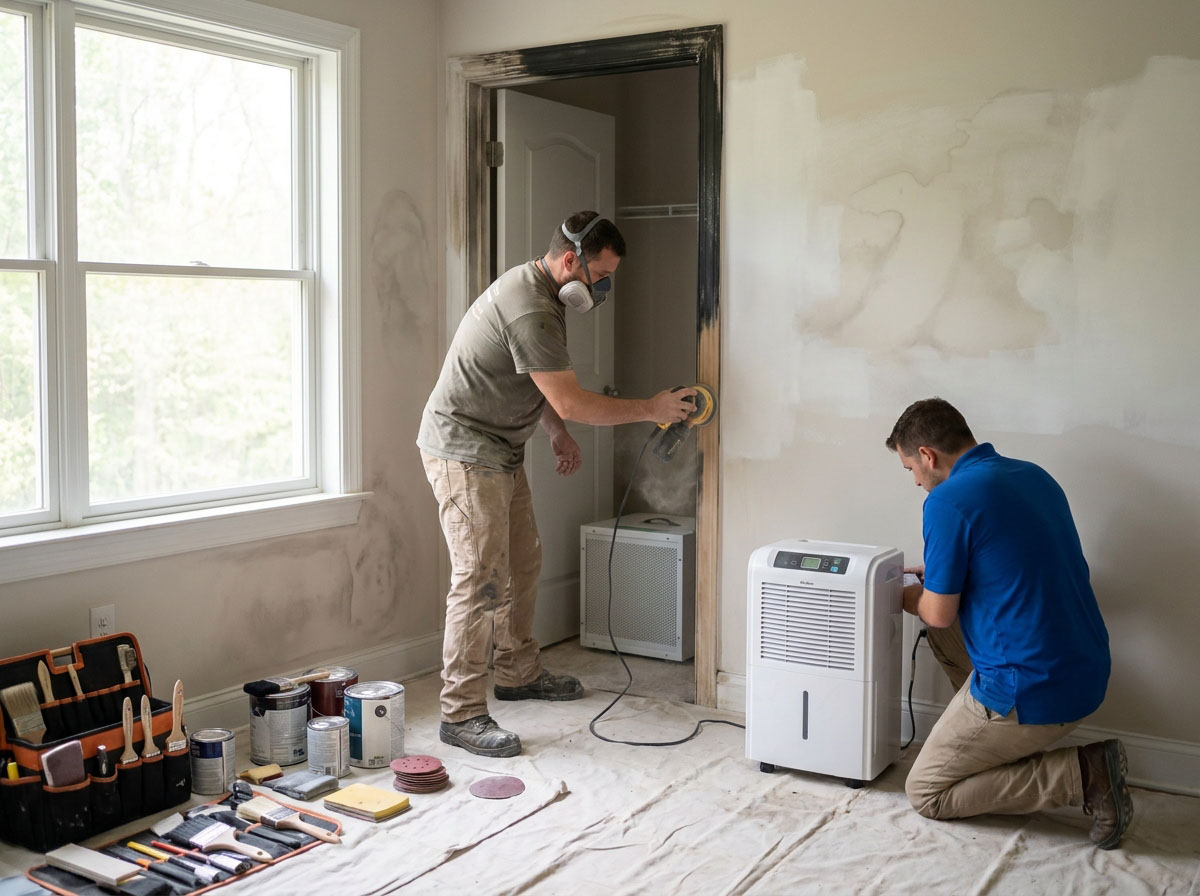
Hiring just any handyman to patch a ceiling is a recipe for a massive mold headache six months down the road. You need a team that focuses on moisture mapping and structural drying, not just cosmetic aesthetics.
When you interview contractors in Nassau County, watch for these non-negotiable standards:
- Proper use of industrial-grade dehumidifiers to pull trapped moisture from floor joists.
- Advanced thermal imaging cameras to track hidden water migration behind finished walls.
- Certifications from the IICRC that prove they understand the science of drying structures.
- Full transparency regarding their mold containment protocols during the demolition phase.
Think of it like this: mold is a living organism that thrives in the dark, damp crevices of your home. If a contractor doesn't verify that the sub-floor and framing are bone dry before closing up the drywall, you are essentially burying the problem alive.
Don't fall for the lowest bid. A cheap fix today usually leads to a ten-times more expensive mold remediation project next year. Ask specifically if they provide a moisture verification report upon completion; if they cannot produce documentation of the humidity levels in your home, keep looking.
Final Words
Waiting for a stain to dry on its own is a gamble you will eventually lose. Every hour that moisture lingers in your drywall, the risk of rot, electrical shorts, and black mold colonies grows exponentially.
If you see signs of moisture, do not wait for the ceiling to bow. Immediate action is the difference between a minor patch job and a complete structural reconstruction of your home.
Take control of your home maintenance by remembering these core truths:
- Moisture rarely stays in one spot; it travels behind walls and ruins insulation.
- DIY fixes often trap water, which creates the perfect environment for hidden fungal growth.
- Insurance companies require detailed proof of damage, so document everything with high-quality photos before you touch anything.
If you are currently dealing with a leak, head over to our main page for Ceiling Water Damage Repair to see how we handle emergency mitigation. We provide the specialized equipment needed to pull water out of your joists before the damage becomes permanent.
Your property is your most significant asset, so treat it with the urgency it deserves. Stop the water, document the destruction, and bring in experts who know how to dry out a Nassau County home properly.
People Also Ask
How much does ceiling water damage repair cost in Nassau County?
Costs vary significantly based on the size of the area, the extent of structural damage, and the presence of mold. On average, localized repairs start at a few hundred dollars, while full ceiling replacements due to severe flooding can reach several thousand.Does homeowners insurance cover ceiling leaks in New York?
Coverage depends on whether the leak resulted from a sudden and accidental event, such as a burst pipe, or gradual neglect. You should review your policy carefully and document all damage immediately to streamline the insurance claims process.How do I know if my ceiling leak is a structural emergency?
If you notice sagging, bulging, or water actively dripping through light fixtures, it is a structural emergency that requires immediate evacuation. These signs indicate that the drywall or plaster is saturated and at high risk of a sudden collapse.How long does it take for mold to grow after a ceiling leak?
Mold can begin to colonize damp surfaces within 24 to 48 hours of initial water exposure. To prevent long term damage, it is critical to initiate professional drying and remediation services as soon as the source of the leak is stopped.Can I paint over a water stain on my ceiling?
You should never paint over a water stain without first identifying and repairing the source of the leak and ensuring the material is completely dry. Painting over damp areas traps moisture inside the structure, which promotes hidden mold growth and potential decay.Need Water Damage Restoration Services?
We provide immediate water damage mitigation and restoration services to property owners throughout Nassau County and surrounding communities. Our rapid response teams stabilize your home or business to prevent further damage and restore your property to pre-loss condition (11501, 11530, 11550, 11590, 11001).
Request Project Estimate